

How to install vinyl plank flooring?
Vinyl wood flooring is known for its versatility and durability. It is comfortable under your feet while still creating a stylish and attractive look for your room. In addition to moisture resistance, vinyl also has anti-fouling and noise reduction features, making it the preferred floor for families with children and pets.
Vinyl flooring is easy to install, you only need to do some preparatory work, and then go through the installation process. Have all the visual appeal of solid hardwood floors. Learning how to install vinyl flooring is something you can do on your own. The cost of vinyl flooring is only a small part of the price of hardwood, making it a great choice for beginners in home improvement. There are four methods, you can choose according to the type of vinyl floor you own.
Installation type 1: Tenon and groove(Click Vinyl)
1. Place the first board in the corner of the room. Work from left to right. Use gaskets to ensure expansion gap with the wall.
2. Lock the tongue and groove connectors and align the seams to complete the first row.
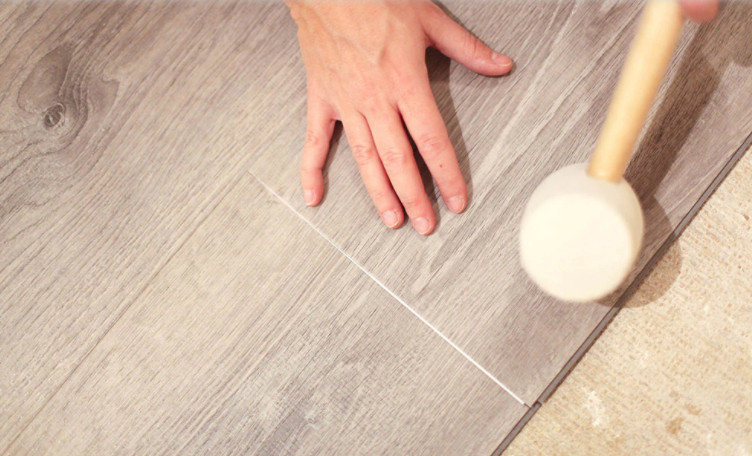
3. Continue laying the floor. Use a tapping block and a rubber hammer to tap the wooden board to the locked position.
4. Use the remaining cutting end to start the next line. They should be at least 6 inches or longer in length.
5. Place the board in the previous row at a slightly inclined angle. This will help it slide into place and interlock perfectly.
6. Add a spacer every few feet around the edge of the floor. After the installation is complete, remove the gasket.
After the installation process is completed, please use copper nails to reinstall the bottom plate. Install finishing molds to cover expansion joints. Reinstall doors and appliances.
Mix several boxes of wooden boards to ensure the color change. Use the end of the first line as the start of the next line. Draw lines on the room according to your preferred layout pattern (such as staggered, straight rows or checkered patterns).
To cut the plank, use a utility knife to pass, and then use a T-shaped square to make a straight cut. Use scissors to cut a few times.
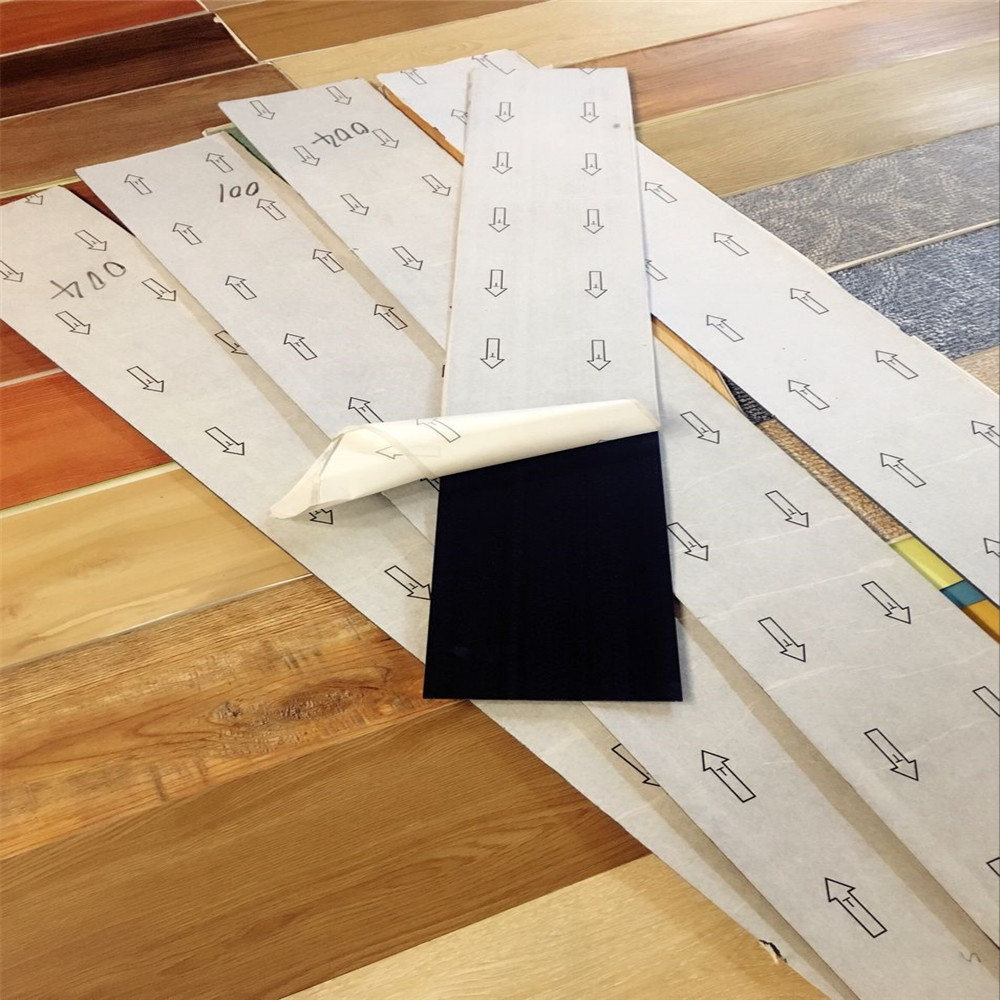
1. Peel off the paper to expose the adhesive. Press the tile or plank down firmly on the surface. Repeat this process until the first line is completed.
2. When you reach the wall, measure the space and mark the vinyl to cut accordingly. Then cut, peel and paste the vinyl.
3. Continue the above two steps until the room is completed.
4. After fully installed, use 100-pound rollers in multiple directions to ensure that the floor and planks are firmly bonded together.
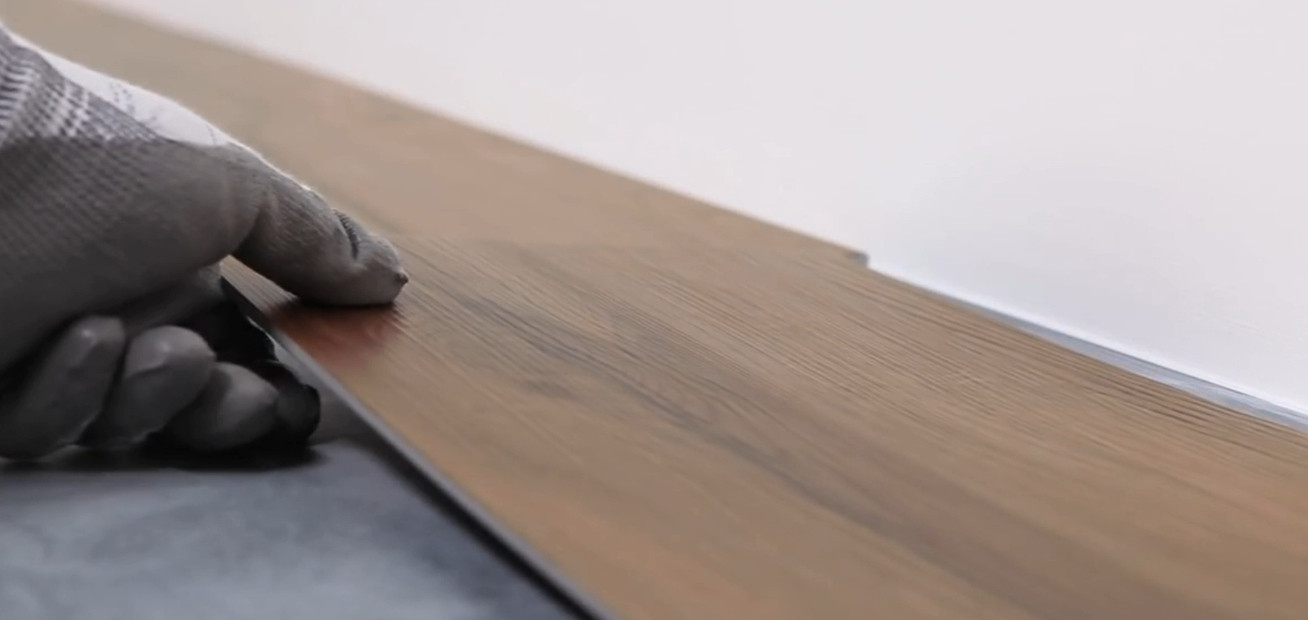
Loose lay flooring is extremely easy to install. You do not need to use any kind of glue, staple, or click-lock system to install this flooring. Instead, this flooring’s back uses friction to get a grip of the subfloor beneath it. Installers that are putting in loose lay vinyl flooring literally just have to set it into position. Sure there is some cutting required for installation with many of these kits, but it’s simple to do and doesn’t require any advanced skill. Installers just go around the room and lay down the planks quickly and easily. When you ask an installer to come to your home to put down loose lay vinyl planks, you’ll often receive an enthusiastic response, because most installers love to put the flooring down. It’s also common to pay less for the installation of loose lay vinyl floors because they don’t take very long to put down at all.
1. Make sure the floor is clean, leveled, and dry before installation
Remove any foreign substances such as wax, grease, dirt, or any other chemicals that could prevent a good bond.
2. Clean up all the dust and debris.
3. Fill any holes with patch
4. Determine if the substrate is porous or nonporous
Recommended Trowels: If porous, use a 1/16” x 1/16” x 1/16” Square Notch. If Non-porous, use a 1/16” x 1/32” x 1/32” U Notch.
5. Acclimate glue down planks for 48 hours in 65 to 85 degree temperature.
6. Check for matching batch numbers on the side of each box.
7. Open and work from multiple boxes to minimize pattern repeat and create a more natural look.
Check for any defects prior to installation.
8. Draw your guideline on your starting wall. Measure two ft out and mark on one side, then repeat the measure and mark on the opposite side.
9. Connect two points with a chalk line and trace over it with a pencil or marker.
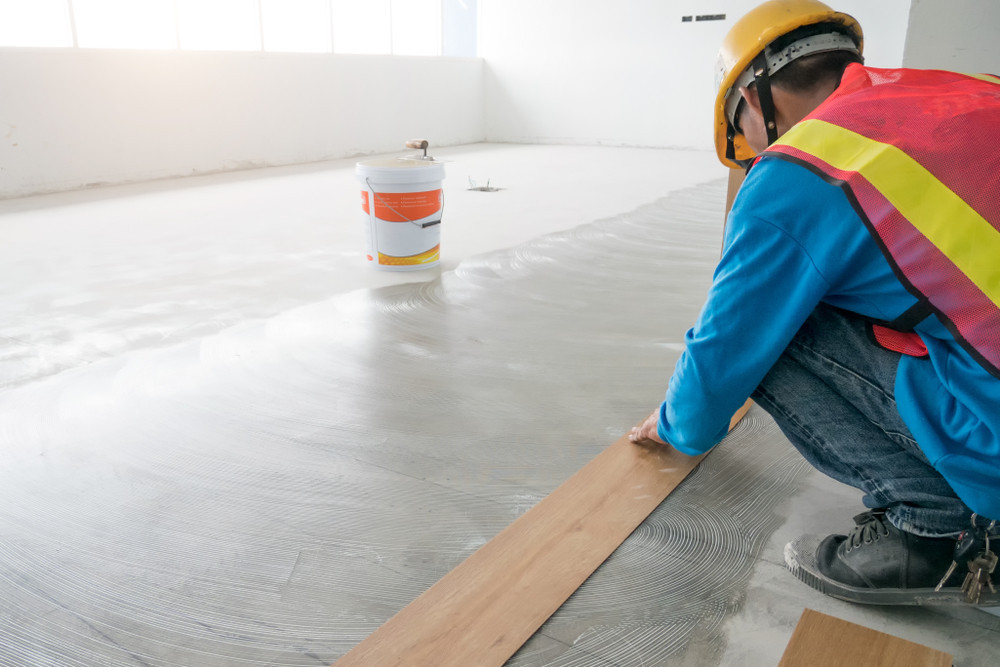
10. Open recommended adhesive and begin to spread and even coat throughout.
Hold the trowel at a 45 degree angle in order to apply the right amount of adhesive for a secure bond.
11. Let adhesive dry and wait for a tacky touch.
12. Begin installing your planks along the guideline.
13. Measure your plank, mark your cut, score with a utility knife, and snap it in half.
14. Continue laying your planks while making sure they’re together tightly.
If you have other installation problems, you can contact our salesperson. We provide different types of vinyl flooring to meet your different needs.